
As I was going through some odds and ends in our living room this week, I found a craft project flyer I’d picked up a while back at Hobby Lobby. As I’m sure you’ve noticed, I’ve been on a 1920’s kick lately and this craft fits right in. It’s called, ‘A Case for Creativity’ because you use pillowcases to craft these items: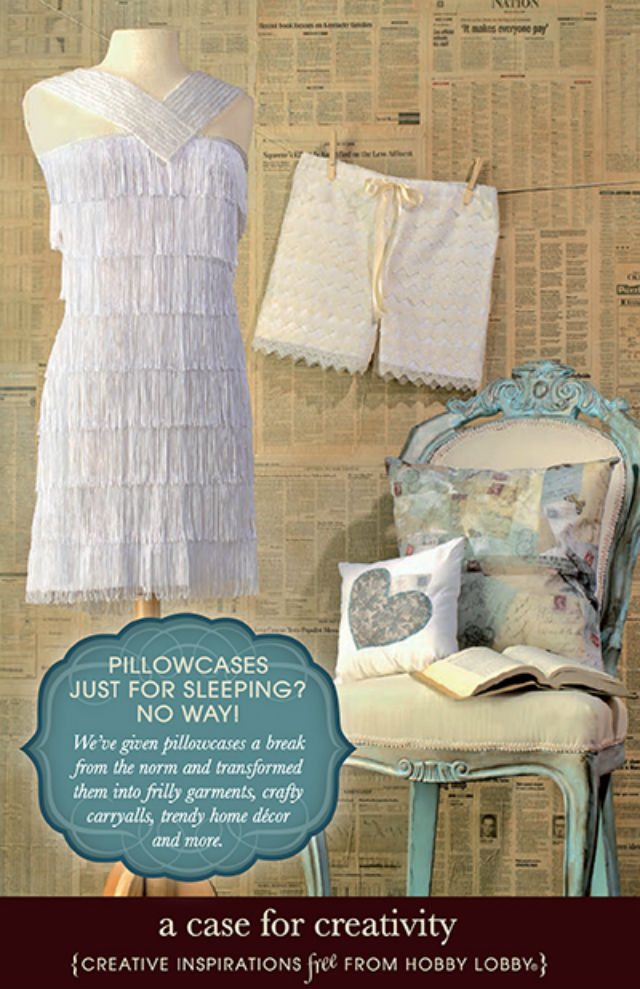 Here is a link to a printable pdf of the flyer, which has more projects included than just the two above, or you can read and follow the instructions as I’ve typed them out below.* I think the bloomers are a “must” the next time I get the craft room organized!
*This craft, its photos and all directions are courtesy of Hobby Lobby. The directions I have typed out come directly from the pdf link above and all credit goes to Hobby Lobby.
en-cased in glamour (refers to the picture of the flapper-style dress):
Cut a band of fabric from the closed end of a simple white pillowcase before stitching up rows of fluffy fringe. Then, use the hemmed end of a second case to make straps. Some beaded trim…and baby, you’re in!
lacy linens (refers to the picture of the, as I call them, “bloomers”):
A single pillowcase provided the fabric for these simple shorts, an easy sew using SImplicity #3696! Grab some lace trim and some coordinating ribbon, and then follow the step-by-step instructions below.
- Place pillowcase on flat surface. Measure up 16″ from the hemmed edge and draw a line from left to right. Cut on this line and discard upper half of pillowcase.
- Cut remaining piece in half vertically. Each piece will be 10″ wide. Open the two pieces and lay flat with right sides together.
- To create inseam, measure up 6″ from hemmed edge and 1″ from the left side. Mark this area with a fabric pen, curving the corner slightly. Cut on this line.
- Now measure up 6″ from the hemmed edge and 2″ from the right side. Mark and cut as in Step 3.
- Sew horizontal rows of lace to the right side of each piece. Use the same spacing on each piece so lace will match up at center front and center back.
- Pin the two pieces with right sides together and stitch the sides with 5/8″ seam allowance. Press open. These will become the center front and center back seams of your shorts.
- Match center front seam to center back seam, aligning inseams. Stitch inseams with right sides together, using 5/8″ seam allowance. Press open.
- To make casing, press under 1/4″ on top edge of shorts. Turn the pressed edge to the inside 1″ and pin in place. Stitch along this edge, leaving an opening to insert ribbon at center front seam.
- Insert ribbon through casing, using a safety pin to thread through.
